
HOW TO DRAW CHIFFON
In this step by step tutorial, you will learn how to draw transparent fabrics such as chiffon, tulle or basically any light and translucent material that you might want to use in your designs. A well-done fashion sketch needs to show the fabrics used in the design in a way that is easy to tell and also appealing to the viewer. Drawing chiffon will no longer be a challenge but rather a fun and exciting part of the creative process. Enjoy!


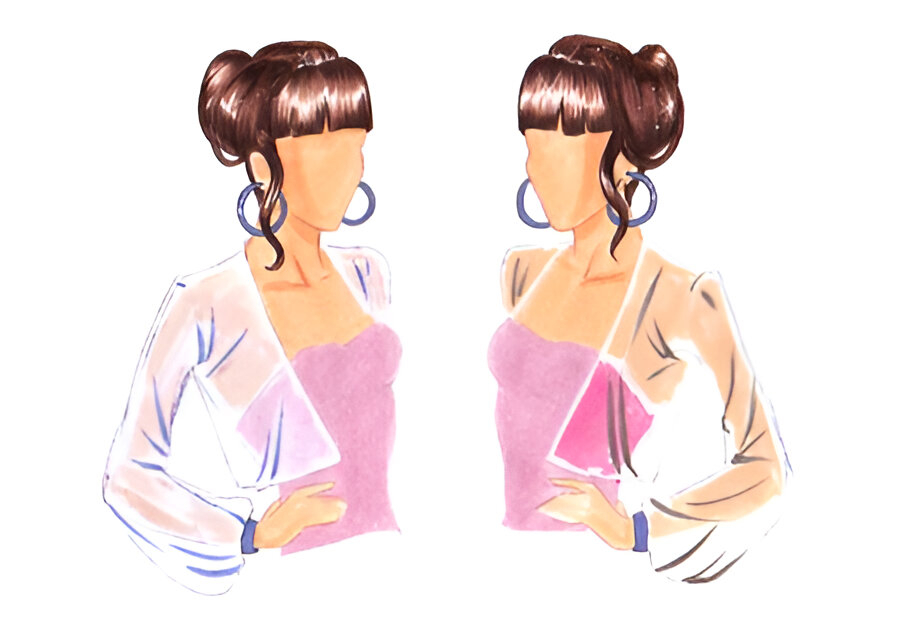
Step 1: The color of your fabric
The first thing you need to do when drawing chiffon or other types of transparent fabric is to decide on its color. See-through materials will show what’s underneath but will change its color. Start by coloring the areas that are NOT covered by the chiffon. If the chiffon is light prepare a lighter shade of the skintone and the clothes color. If the chiffon is dark – prepare a darker shade of the skintone and the clothes.

Step 2: Color the areas covered by the chiffon
Start coloring the areas that are underneath the sheer fabric. Make sure you are not filling them all the way to the edge. It’s okay if the coloring isn’t perfectly smooth at this point. You can play with the direction of your strokes as long as you stay in the outlines.

NOTICE THAT THE RIGHT BOOTY IS PLACED LOWER THAT THE LEFT ONE. IF THE MODEL WAS FACING THE OTHER DIRECTION THIS WOULD BE THE OPPOSITE.[
Step 3: Color the chiffon fabric
With the color that you’ve picked gently mark the folds of the chiffon. If you are not sure where to place them check out the “How to draw folds: pants”, “How to draw folds: collar” and the rest of the series in the How to draw CLOTHES tab. It is important not to outline the sheer fabric or fully fill it with color at this point. You want to just gently brush trough some areas and nothing more.
Step 4: Add another layer
Grab a lighter shade of your chiffon color and add some more strokes. The opacity should be greater close to the outline and getting lighter towards the inside. Take your time to make the transitions smooth and nice and try not to cover all the white spaces left from Step 2.

Step 5: Add some pastel
Use a soft pastel and carefully fill in almost the whole chiffon fabric. Leave empty spaces here and there and don’t make this layer too opaque. You want to place less amount of the pastel in the areas where you see only the sheer fabric and nothing underneath.
FOR BEST RESULTS USE YOUR FINGERS (OR A COTTON SWAB) TO TAKE SMALL AMOUNT OF THE PASTEL AND GENTLY SMUDGE OVER YOUR DESIGN.

Step 6: Add depth
It’s time to add some shadows and definition to your sheer garment. Use a pencil and go back to the folds to draw shadowed areas where you think they should be. Also, emphasize the outlines underneath the chiffon in case they have disappeared. Don’t overwork it – less is more when drawing transparent materials.

Step 7: Outlines
As you know from the “Outlines: part I “ tutorial, a fashion sketch would look unfinished and fuzzy if you skip the outlining. Always use a shade slightly darker than your original tone and outline everything except for the areas underneath the chiffon.

OUTLINE THE CHIFFON ITSELF BUT LEAVE THE SKIN AND CLOTHES UNDERNEATH AS THEY ARE. THIS WAY THEY WILL LOOK BLURRED AND SOFTER HELPING YOU TO CREATE THE ILLUSION OF A TRANSPARENT TEXTILE.
You just learned hot to draw chiffon. This technique can be used with any type of drawing material. Experiment with watercolors, markers, acrylics or anything that you like working with. Have fun drawing your new sheer designs!
Happy drawing!

LATEST POST