
HOW TO DRAW FRONT VIEW SHOES
Accessories and especially shoes are very important for a successful fashion sketch. In this step by step tutorial, you will learn how to draw high heels and other types of shoes from the front view- which happens to be the most preferred pose in fashion illustrations. Follow the tutorial and enjoy creating beautiful footwear for your models!


Step 1. The right measurements
Before starting to draw the shoes you need to make sure they are the correct size for your fashion figure. As seen in the “Drawing front view pose” tutorial the feet of the model match the size of the head. Measure the head of your model and leave the same space from the ankles to the ground. Start the line right in the middle of the leg and pull it down.

Step 2. Base shapes
Divide the Centerline into 3 even parts. Starting from the ankles draw two slanted lines in the first two sections. Add a slightly wider horizontal ellipse in the lowest section. Be careful with the proportions of these base shapes – the feet need to be only slightly wider compared to the ankles.

Step 3. Draw some toes
Now it’s time to refine the toes line. Draw a curved line that is pointer than the ellipse but fits into it. It helps if you stop at the Centerline. Make sure that this pointed arch is also slightly wider than the rest of the foot as was the ellipse.
IF YOU ARE DRAWING AN OPEN TOE SHOES THE THUMB WILL OCCUPY ALMOST THE WHOLE INNER HALF OF THE TOES ARCH. THIS IS WHY YOU WANT TO MAKE THE INNER HALF OF THE ARCH MORE OVAL, LESS POINTY

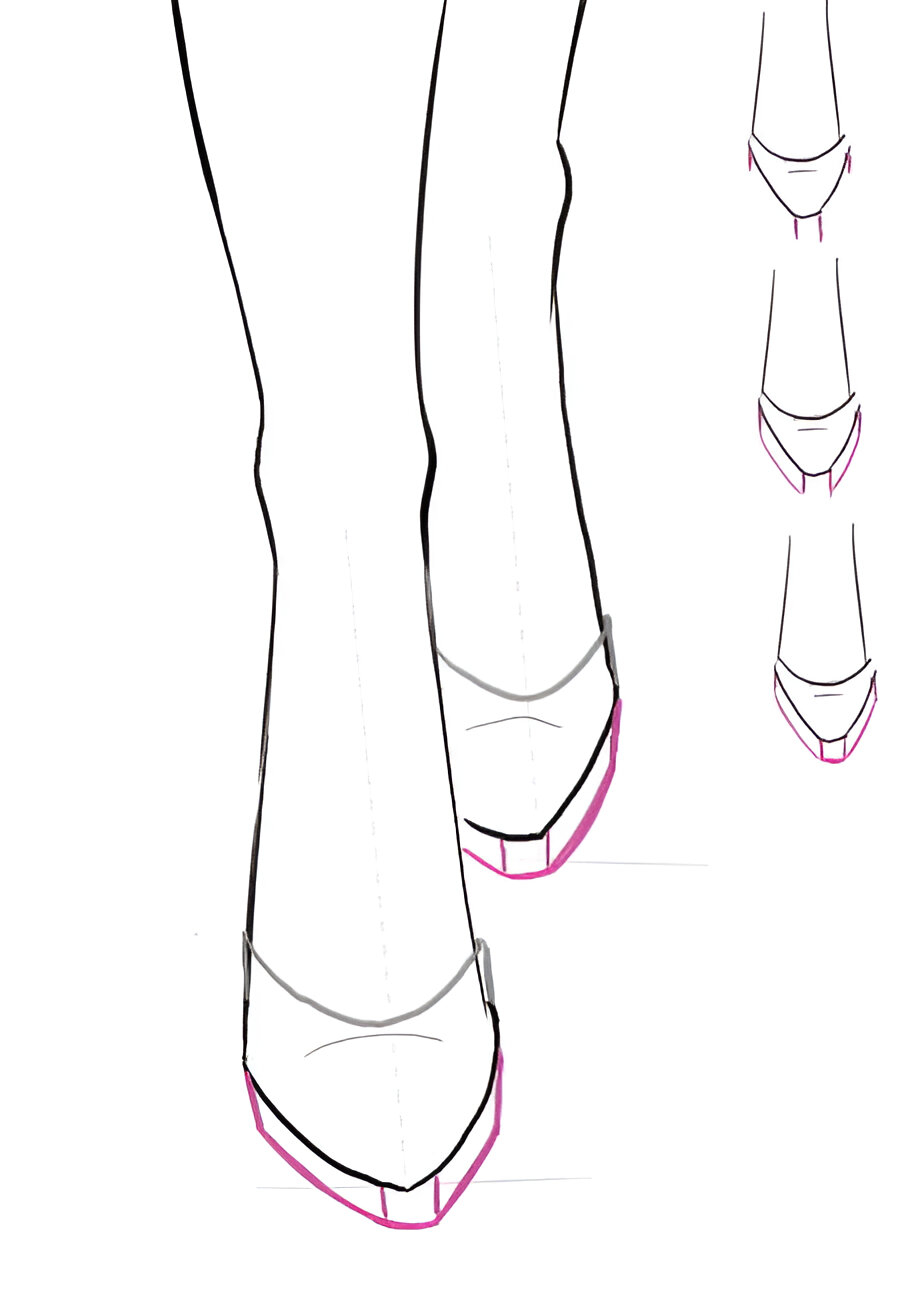
Step 4. Drawing the front view shoe
It is important not to draw the front view shoe curve too deep to the toes nor too flat and straight. Use the lower dividing line from Step 2 to help you find the accurate place for the shoe curve. It should be slightly higher than the dividing line in the ends and dipping in at the Centerline. You know from the “how to draw clothes” tutorials that everything wrapped around the body has its own volume and thickness. Draw a thin curving around the foot as shown below. Draw a flipped smaller curve right under the big one. This one indicates the delicate bump of the toes and will add a touch of realism to the sketch.

Step 5. Draw the soles
Not only the side view shoes need beautiful heels and soles. The different designs will have soles of different styles, but all of them follow the same rule. The sole looks longer in the center and shorter in the ends. There is also has a small parallel to the ground part right in the middle.
Step 6. Drawing shoe straps
Some designs like roman sandals or ballerina shoes will have straps wrapped around the foot and the leg. Always remember to draw them slightly curved since the body underneath has some volume and this needs to be shown in your fashion illustration.

Step 7. Coloring
Color the shoes and leave a highlight on the toes bump. The highlight is a few shades lighter than the base color. The sole will look nice and shiny if you leave a few white lines here and there on the sole.

Step 8. Coloring shadows
Drawing shadows adds a lot to the footwear designs. Use a darker shade of your base color and blend form the outside parts in. Don’t miss the straps.

I hope that this step by step tutorial has helped you to gain more understanding of how to draw front view shoes easily. Check out the rest of the tutorials in our “How To Draw Shoes” section – you will find tutorials on how to draw uggs, how to draw sneakers, high heels and many more.
So what are you going to sketch next with these new skills?
Happy drawing!

LATEST POST