
HOW TO DRAW A BLAZER
by in CLOTHES
Ever wondered how to draw a jacket? This might seem like a difficult task, but once you learn the basics it will be one of your favorite garments to draw and design. A nice, good-looking jacket will add sophistication to a dress, a flared skirt, a business suit, even jeans. “Dress for success” and have fun with the new tutorial!


Step 1: Button place
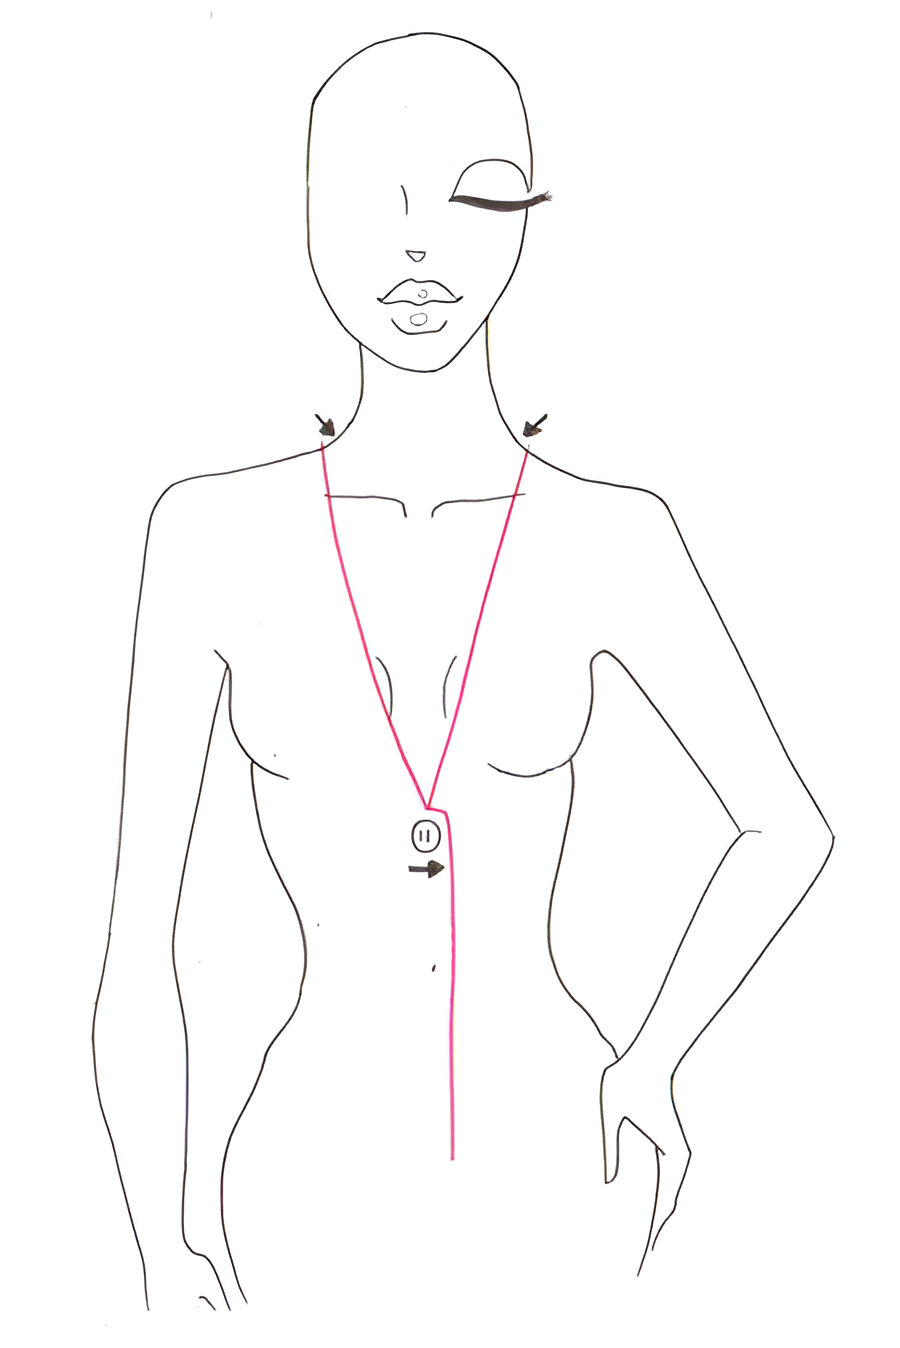
Once you have prepared the fashion figure start by finding a good place for the jacket closing. There are no strict rules, but in many jackets, the first button will be below the chests.
Make sure you place the button on the torso Centerline.

Step 2: Neckline
The jacket neckline is a deep “V” shape starting from the shoulders and ending close to the button. It is important to start the “V” from the place where the neck and the shoulders connect. If this point is moved out then the jacket will look sloppy and badly tailored.
Draw a vertical line from the right side of the button to indicate the overlapping closure.
THE CLOSURE OF MEN AND WOMEN JACKETS IS DIFFERENTLY SITUATED. IN WOMEN’S JACKETS THE OVERLAPPING WILL BE TOWARDS THE RIGHT, IS MEN’S – TOWARDS THE LEFT SIDE.
Step 3: More guidelines
Make a horizontal “V” below the collarbones. This will be your guideline to draw the collar and lapel, which are the tricky part of jackets. Notice that the lower arm of the “V” is longer than the upper one.
Starting from the point where the neckline touches the shoulders draw two little triangular shapes. They indicate that the collar is 3-dimensional and turns around the neck.
Finally, add the finishing hem at the bottom of the jacket.

Step 4: Draw the collar and lapel
The collar and the lapels are some of the spots where you can really design and make the jacket look unique. In the example illustration you will see the classic version, but feel free to design it your own way.
Make sure that the collar is turning around the neck, as shown, and that the lapels end a little bit before they reach the button.

Step 5: Outlines
THE CLOTHES MIGHT BE SLIM FITTING, BUT THIS DOESN’T MEAN THEY’RE STICK TO THE BODY. ALWAYS LEAVE SOME SPACE, EXCEPT FOR WHEN YOU’RE DRAWING ELASTIC FABRIC, LEGGINGS AND SWIMSUITS.

Step 6: Draw some folds
After you’ve defined the silhouette it’s time to draw the folds and make it look believable. Draw wrinkles around the elbow and the waist and don’t forget to mark 1-2 lines around the button. The lines shouldn’t be parallel – draw them freehand with different lengths.

Step 7: Add the details
This is the stage where the designing comes back. Draw the hems of the jacket in the inner part of the sleeve, the princess hems, add some pockets and additional buttons if you like. Decorations are welcome!

Don’t forget to experiment! Draw a jacket that adds to the modern silhouette of our designs and have fun!
Play with the lapels form and the hems and you will get different results every time. Move the closure up or down. Make it shorter or longer – it’s up to your creativity now. Check another alternative way to draw the collar in our tutorial “How to draw a leather jacket“.
Happy drawing!

LATEST POST