
HOW TO DRAW A FLARED SKIRT
A flared skirt has been one of the strongest symbols of femininity for centuries. In this tutorial, you will learn how to draw a full skirt easily. You will discover how to draw and place the folds of it and make the skirt look nice and realistic. Enjoy!


Step 1: Define the skirt length
As usual start by drawing the fashion figure*. The next thing to do is to mark the skirt length with horizontal lines. Make sure the lines are light since they will be erased soon.
* For the purpose of this tutorial Fashion Template 031 was used but feel free to draw your own figure too.

Step 2: Curving the lines
Small things make a difference. To make the flare skirt appear more realistic curve up slightly the lines you just drew. Make sure the one on the waistline is curved up while the hemline is curved down. Mark the belt.

Step 3: Smiles
It’s time to draw some “smiles” indicating the skirt folds. Leave some space between them and make sure they are following the hemline direction. Also, remember to draw these uplifted curves in different sizes. And of course but don’t make too many of them.

THICK FABRICS WILL HAVE LESS AND LARGER FOLDS. THINNER FABRICS WILL HAVE MORE AND THINNER FOLDS.
Step 4: Finish the hemline
Pull a short vertical line at the outer side of the last “smiles”. A bit higher draw another “smile” curve right next to them. Don’t leave any space between them.
Also, draw down-turned curves connecting the “smiles”.

Step 5: Outline
The next step is to connect the belt to the skirt hemline. When drawing a flared skirt keep in mind that the outline is not just a straight line. It has a small bulge at the top and the overall shape resembles a bell. Forget about straight lines!

Step 6: Guidelines
This step is optional. In case you feel comfortable to simply imagine the guidelines instead of drwing them, feel free to skip it. The goal here is to find the center of each “smile” and connect it to the skirt belt with an almost invisible line. Notice how each guideline is at an angle like sun rays.

Step 7: Folds
The most beautiful part of a full skirt is the soft folds. Following the guidelines connect the “smiles” to the belt. It is very important to keep in mind that the folds have a triangular shape (the bottom is much wider compared to the top). The lines don’t need to be drawn from end to end. Make sure the sketch doesn’t look boring- vary the folds lines.

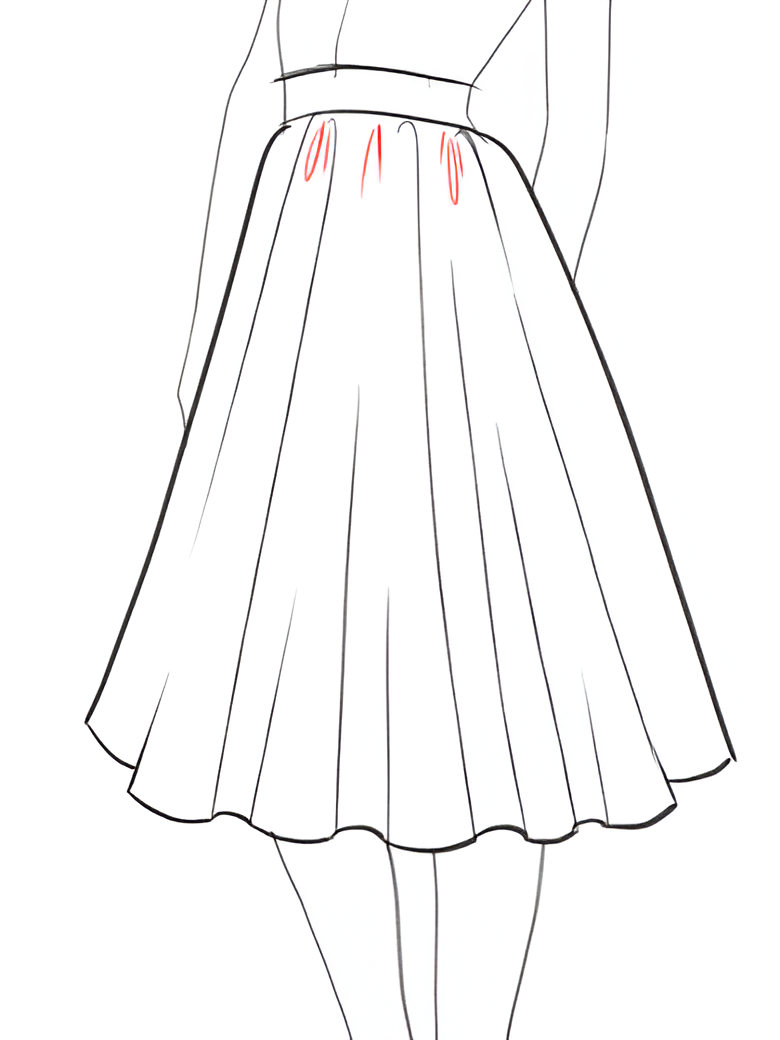
Step 8: Gatherings
Finally, add some small gatherings right below the belt. As a result of the fabric distortion, they are usually formed over the triangular-shaped folds (from smiles to belt).
Step 9: Drawing the flare skirt shadows
The shadow is a lot of fun. The space from the down-turned curves to the belt is where the shadows are. It is enough to fill in with darker shade just the bottom part and make a smooth transition as you go up.

Hopefully, you enjoyed this tutorial and it helped you gain a better understanding of how to draw your flare skirts, full skirts, and dresses designs. To make your fashion sketch even more interesting you can draw a belt over the skirt or add a beautiful flower pattern.
Happy drawing!

LATEST POST