
HOW TO DRAW SNEAKERS
As a fashion designer or illustrator one should be capable of drawing different types of shoes. Drawing beautiful high heels will not always be the best option for every design. In this tutorial, you will learn how to draw sneakers as a sporty alternative to match a more casual, street style of outfits. Have fun!


Step 1. Draw the feet
Start by drawing the feet of your model. There is no need for a lot of details and drawing all the toes. Just a basic shape to start with. If you have difficulties drawing the feet use the “How to draw high heels” and “How to draw front view shoes” as reference.

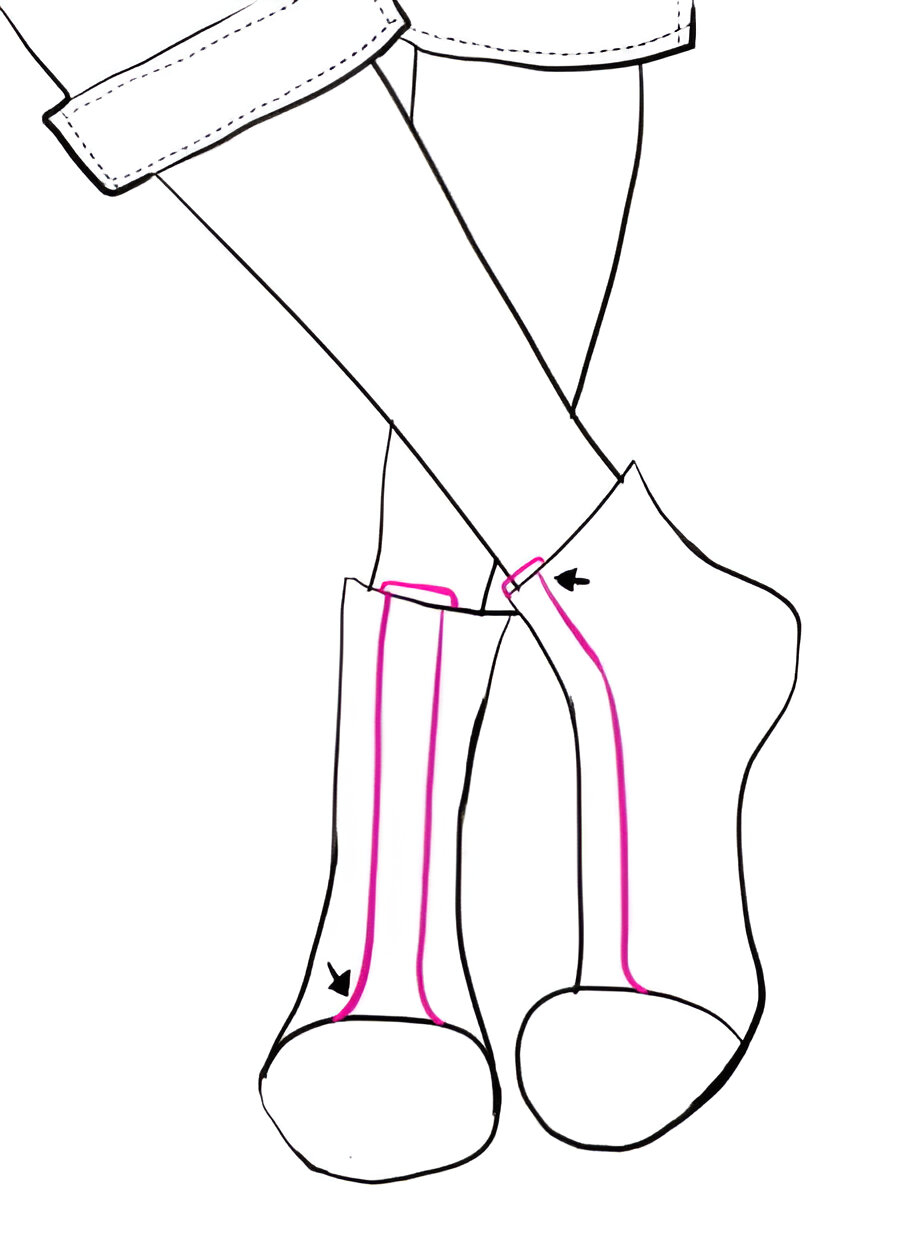
Step 2. Draw the shape and size
Mark the top edge of the sneakers. Usually, they reach slightly above the ankle. Make sure the line is not completely straight – as the legs have volume this will cause a slight curve downwards. Draw ellipses for the toe caps. You want to leave enough space for the toes to move, but not too much to distort the proportion of the feet. Notice that the profile toe cap exceeds only from the top and the side. The bottom if flat.

Step 3. Draw the shoe tongue
Erase all the unnecessary lines and draw the tongue. To achieve the illusion that it is standing behind the upper draw it slightly wider than it as shown in the illustration.
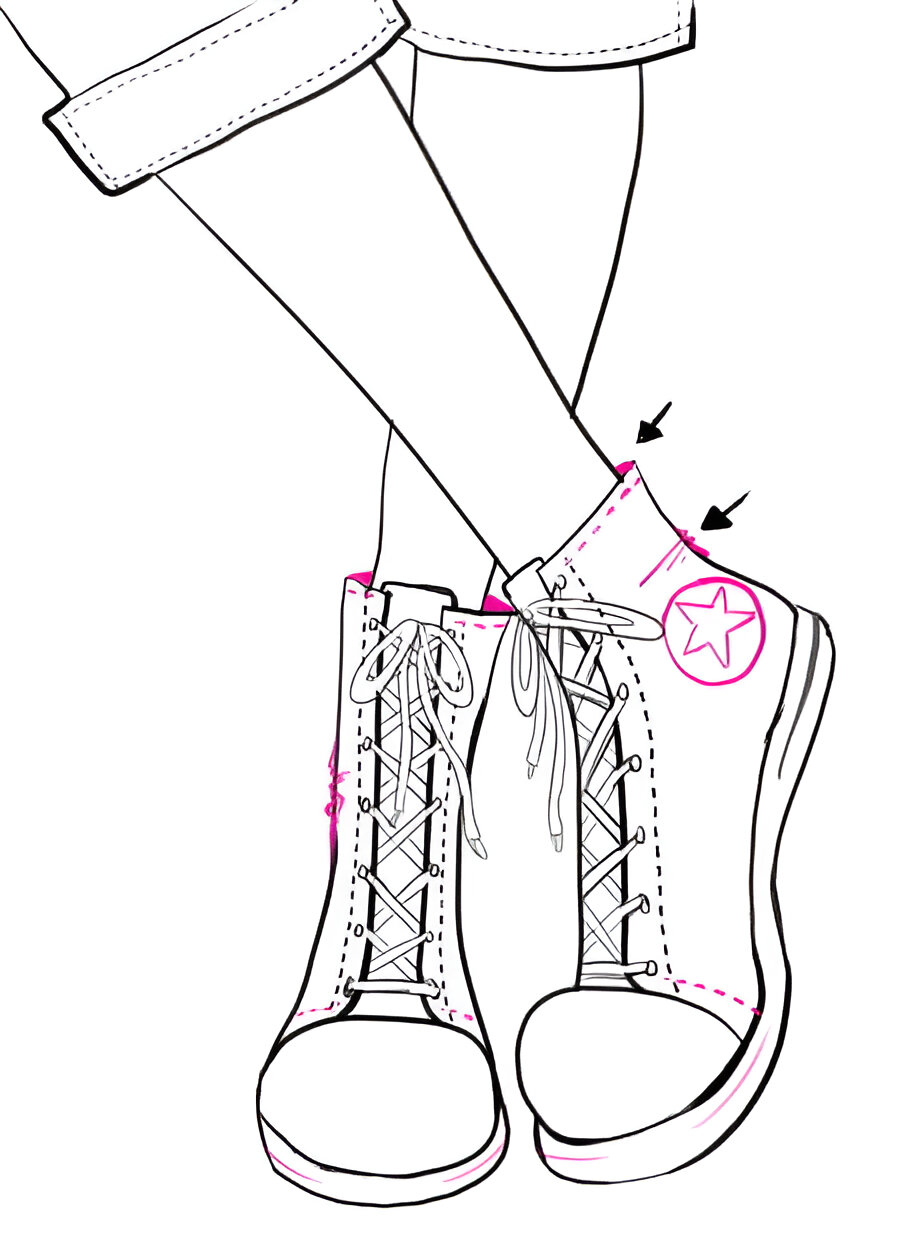
Step 4. Add eyelids and the shoe sole
This type of sports shoes usually have between 6 to 8 eyelids depending on the shoe height. Draw them evenly separated from one another and pull a dashed line right next to them. It represents the typical stitching for sports shoes. Draw the soles of the sneakers. Remember: don’t draw them too thin nor changing in height. Follow the foot guidelines, but feel free to straighten some of the lines where needed.

Step 5. Draw the shoe laces
Pay enough attention to drawing the shoelaces. When the fashion sketch is finished it will be a big plus if you have them drawn correctly. Start by drawing the lines marked as red and add the green ones later. The logic is the same as doing it in real life: starting from the bottom makes a zig-zag skipping one eyelid on each side. Use an eraser and make sure the green lines go behind the red ones.
For a more detailed explanation on how to draw the shoelaces check out the “How to draw a corset” tutorial
How to draw sneakers step by step 5 – accessories, shoes, sneakers – how to draw sneakers
Step 6. Build up
Time to draw the shoelaces knot. The easiest way to do it is by drawing a horizontal “8” for the ears and two loose lines hanging down from its center ( they are not straight! ) Outline it all and add two tiny oblong shapes to the bottom of the laces to finish them. Add a decorative line to the middle of the backside of the sole.

Step 7. Draw the Converse logo
Your sneakers drawing wouldn’t be complete without the signature Converse logo. Of course, you can draw your own interpretation of the star or anything else your imagination creates. Don’t forget to draw some more stitches on the front side of the shoes and also several small creases right above the heel to hint that shoes are made of fabric.
Step 8. Color your drawing
Choose a nice shade that goes well with the rest of your design and cover the fabric part of the sneakers. Use markers, watercolor or digital media tools.
The toe caps, soles and laces should be left lighter. Add a gentle shadow to the sides of the tongue to emphasize it’s standing behind and you are good to go!

Learning how to draw sneakers can be a lot of fun and it definitely helps to create a different mood of the fashion designs. Sometimes we just want a more casual style for our models. I want to encourage you to experiment with shapes, colors, and designs to make your illustrations unique and different every time!
Happy drawing!

LATEST POST