
HOW TO DRAW TRAINERS
In this step-by-step tutorial, we will learn how to draw trainers. Because not every fashion sketch and every design you create needs high heel shoes. Sometimes all that a casual collection needs is a great pair of sport shoes to complete the look. Unlike the “How To Draw Sneakers” tutorial which shows you how to draw Converse type of shoes, here we will focus on how to draw sneakers that are so much in trend this year. So without further ado, grab your pencils and let’s get started!


1. Begin with a drawing of feet
Every drawing begins with a good base. Feel free to download this picture if you want to follow along the tutorial or sketch a similar feet pose.
The first couple of times, until you master the technique, you may want to practice on fairly large scale so that the details are easier to make.
If you want to master drawing the feet, check out the online course “HOW TO DRAW FEET” or directly download Fashion Template #13 which is amazing for drawing not only sport shoes, but all other types of shoewear.

2. The Symmetry guidelines
One of the feet is facing forward, the other is turned to the side. Let’s mark the Centerline of both feet and put a tiny dot bellow the ankle, above the big toe and in the middle between the two.
These dots will help with the symmetry of both shoes

3. Top of the trainers
Starting from the Centerline’s top dot, draw two diagonal lines going down. The angle should not be too steep – make sure the heel is covered.

4. Topline shape
Running shoes have a specific topline shape. Follow the guideline from previous step and try to soften it. The line you draw should sink down right under the ankle and then the go up again, reaching higher than the original guideline from previous step.

5. Sole guidelines
Athletic shoes are designed to be comfortable and the best position for the foot is when the heel is ever so slightly elevated. Let’s recreate this effect in our fashion sketch!
Sketch the sole of the trainers and make sure it is thicker towards the heel and gets thinner towards the toes.
NOTICE THAT THERE IS AN UPWARDS MOTION OF THE SOLE IN THE TOES AREA AND THE SOLE IS VERY, VERY THIN THERE. THIS IS EASY TO SPOT IF YOU LOOK AT REFERENCES PICTURES TOO.

6. Sole Front
The outsole needs to curve up towards covering the toes. Use the Centerline dot we did before. It will guide you where exactly to end the shape. It should be right in the middle and of course, symmetrical for both shoes.

7. Finalize the sole
At this point, we can play with the silhouette of the trainers and draw some roughness on the bottom of the sole.
A NICE TOUCH THAT WILL MAKE YOUR TRAINERS SKETCH EVEN MORE REALISTIC IS TO MAKE THE BACK OF THE SOLE TILTED, INSTEAD OF COMPLETELY VERTICAL. NOTICE HOW THE SILHOUETTE OF THE SHOE CHANGES WHEN THE PART THAT COVERS HEEL CONNECTS TO THE SOLE.

8. Shoe Tongue
Draw the shoe tongue. Notice that the profile shoe is only half as wide as the front. Both have the same length though, which we achieve by measuring the distance to the dots on the Centerline.
9. Draw the shoelaces
Time to draw the eyelets and the shoelaces. You can draw as many eyelets as you wish, but the most common number is between 6 to 8. The shoelaces come in many ways to tie. I’ve done a very basic design here, but you can check out the “How to draw a corset” tutorial and see another way to do it.

10. Toe Vamp
Erase all the lines you no longer need and it’s time to start designing the elements of the sneakers that make them unique. The element that goes over the toes is called a vamp and you can get really creative with it’s shape. The only thing to remember is symmetry – use the tongue and the distance to sole as your guides.

11. Draw the lace cage
Time to add the lace cage. This element provides extra security to the laces, but is also a great opportunity for designers to create unique shapes and patterns that will make the shoes unique.

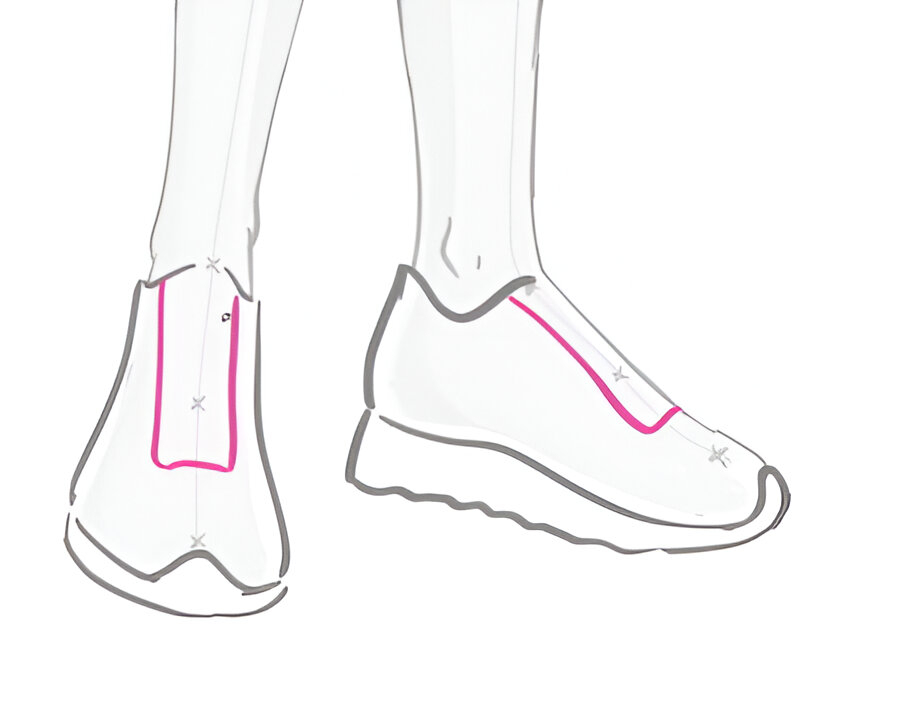
12. Overlays
The overlays are the most fun part of drawing the prefect trainers sketch. We usually have 2 main areas – the one around the heel and the other is the whole side of the foot. There are no strict rules here, apart for the fact that most often the elements on the side are pointing towards the toes in some way or another.
Don’t forget to add tiny dots pattern to some of the overlays – it’s an optional step, but will make them more believable.

13. Color the sketch
Many trainers come in the classic white color. It’s your choice whether to make them black, white or colorful. You can play with the color of overlays, sole and shoelaces – the sky is the limit!

I hope you enjoyed this step-by-step tutorial and maybe it inspired you to sketch more diverse fashion designs for your portfolio. After all, we don’t go around in prom dresses every day and casual, sporty designs that most people prefer to wear need proper footwear – cool, comfortable trainers.
Happy drawing!

LATEST POST